Follow this step-by-step guide to safely replace the battery on your Moto G55 using a genuine Motorola replacement, ensuring optimal performance and device longevity.
moto G55 repair

Battery Replacement - g55
20-25 MINUTES
VIDEO / PHOTO GUIDE
Parts Used
moto g55 5G | Battery | QA50 | SB18E40223
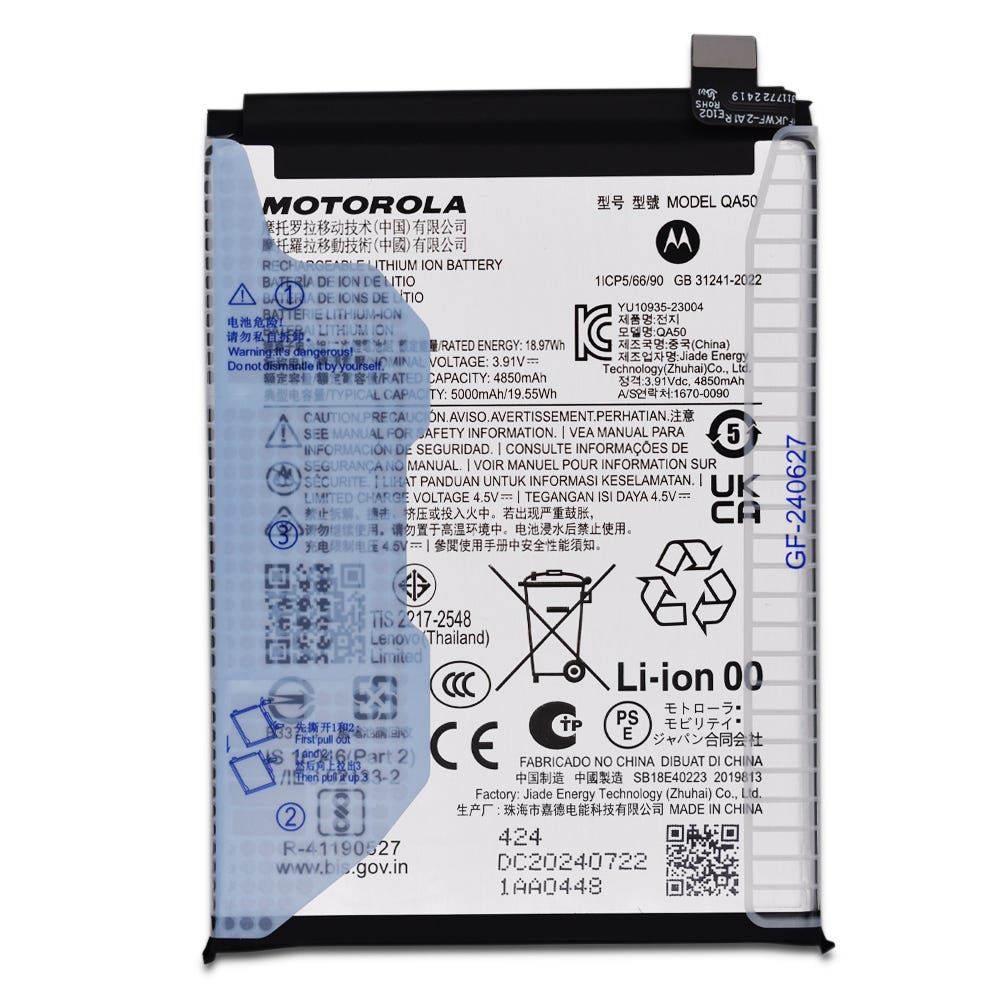
RBSKU23131 SB18E40223
£12.46
Tools & Consumables Required
Motorola Complete Home Repair Tool Kit
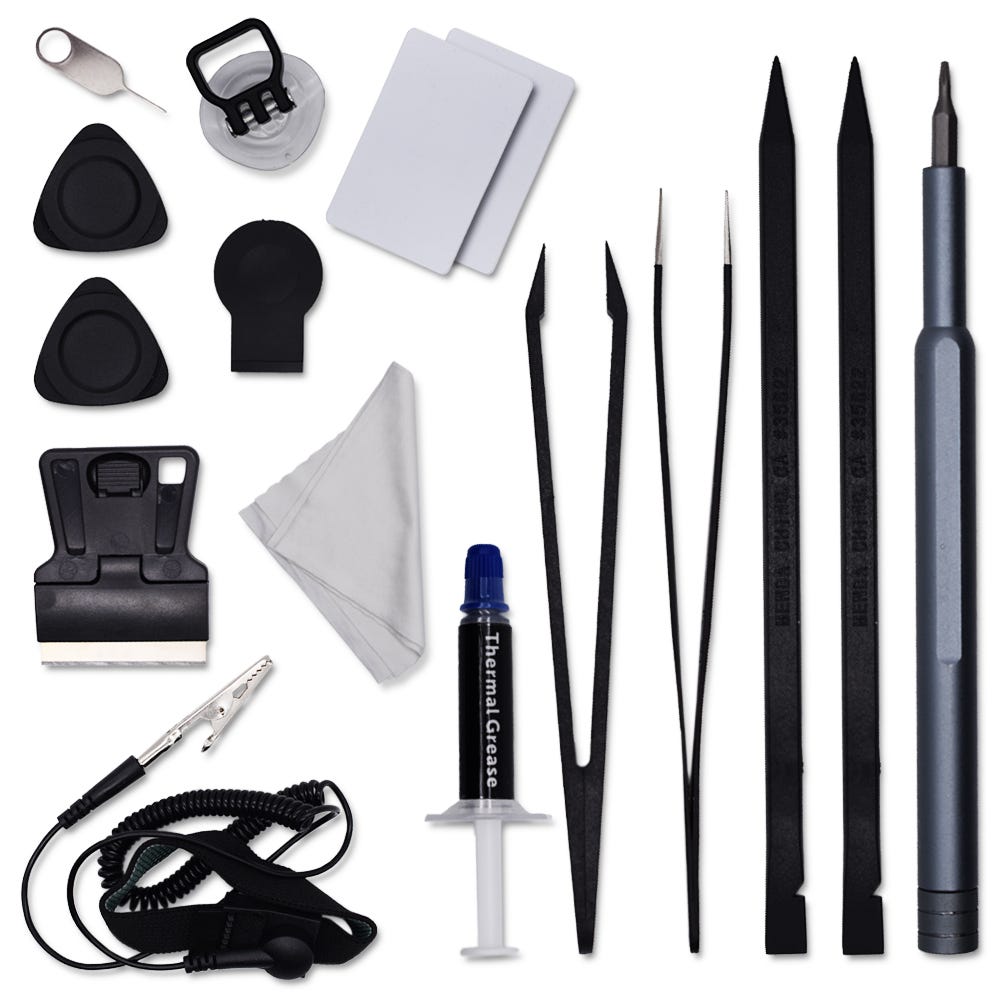
RBSKU23227 RBSKU23227
£12.46
Technician notes:
Some caution to be used here! Firstly, if possible fully discharge your phone before carrying out this repair, secondly, never use metal tools around the battery, you never want to puncture or damage the battery on removal. Use only soft, plastic tools - lastly, ensure you correctly dispose of your spend battery at your local recycling centre.
Some caution to be used here! Firstly, if possible fully discharge your phone before carrying out this repair, secondly, never use metal tools around the battery, you never want to puncture or damage the battery on removal. Use only soft, plastic tools - lastly, ensure you correctly dispose of your spend battery at your local recycling centre.
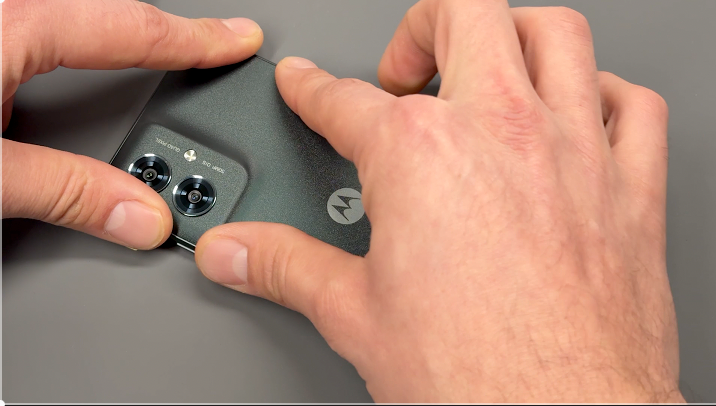
- Full Battery Cover Removal

Use the SIM card ejection tool to remove the SIM card tray and SIM card.
Apply heat using a hairdryer on a medium setting or a heat gun on a low setting until the back of the phone is warm to the touch.
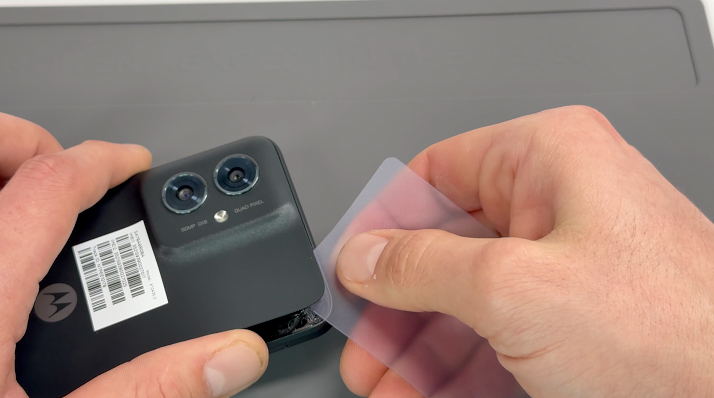
Using a thin, solid prying tool or a handled blade, gently pry the area between the battery cover and the frame until a small gap is created.
Insert a plastic card, playing card, or rigid card into the gap and carefully slide it around the edges to break the adhesive seal securing the battery cover. Once the seal is fully broken, remove the battery cover.
Clean off any remaining adhesive from the frame using a probe tool or by gently pulling and rubbing it away with your finger.
- Frame Separation
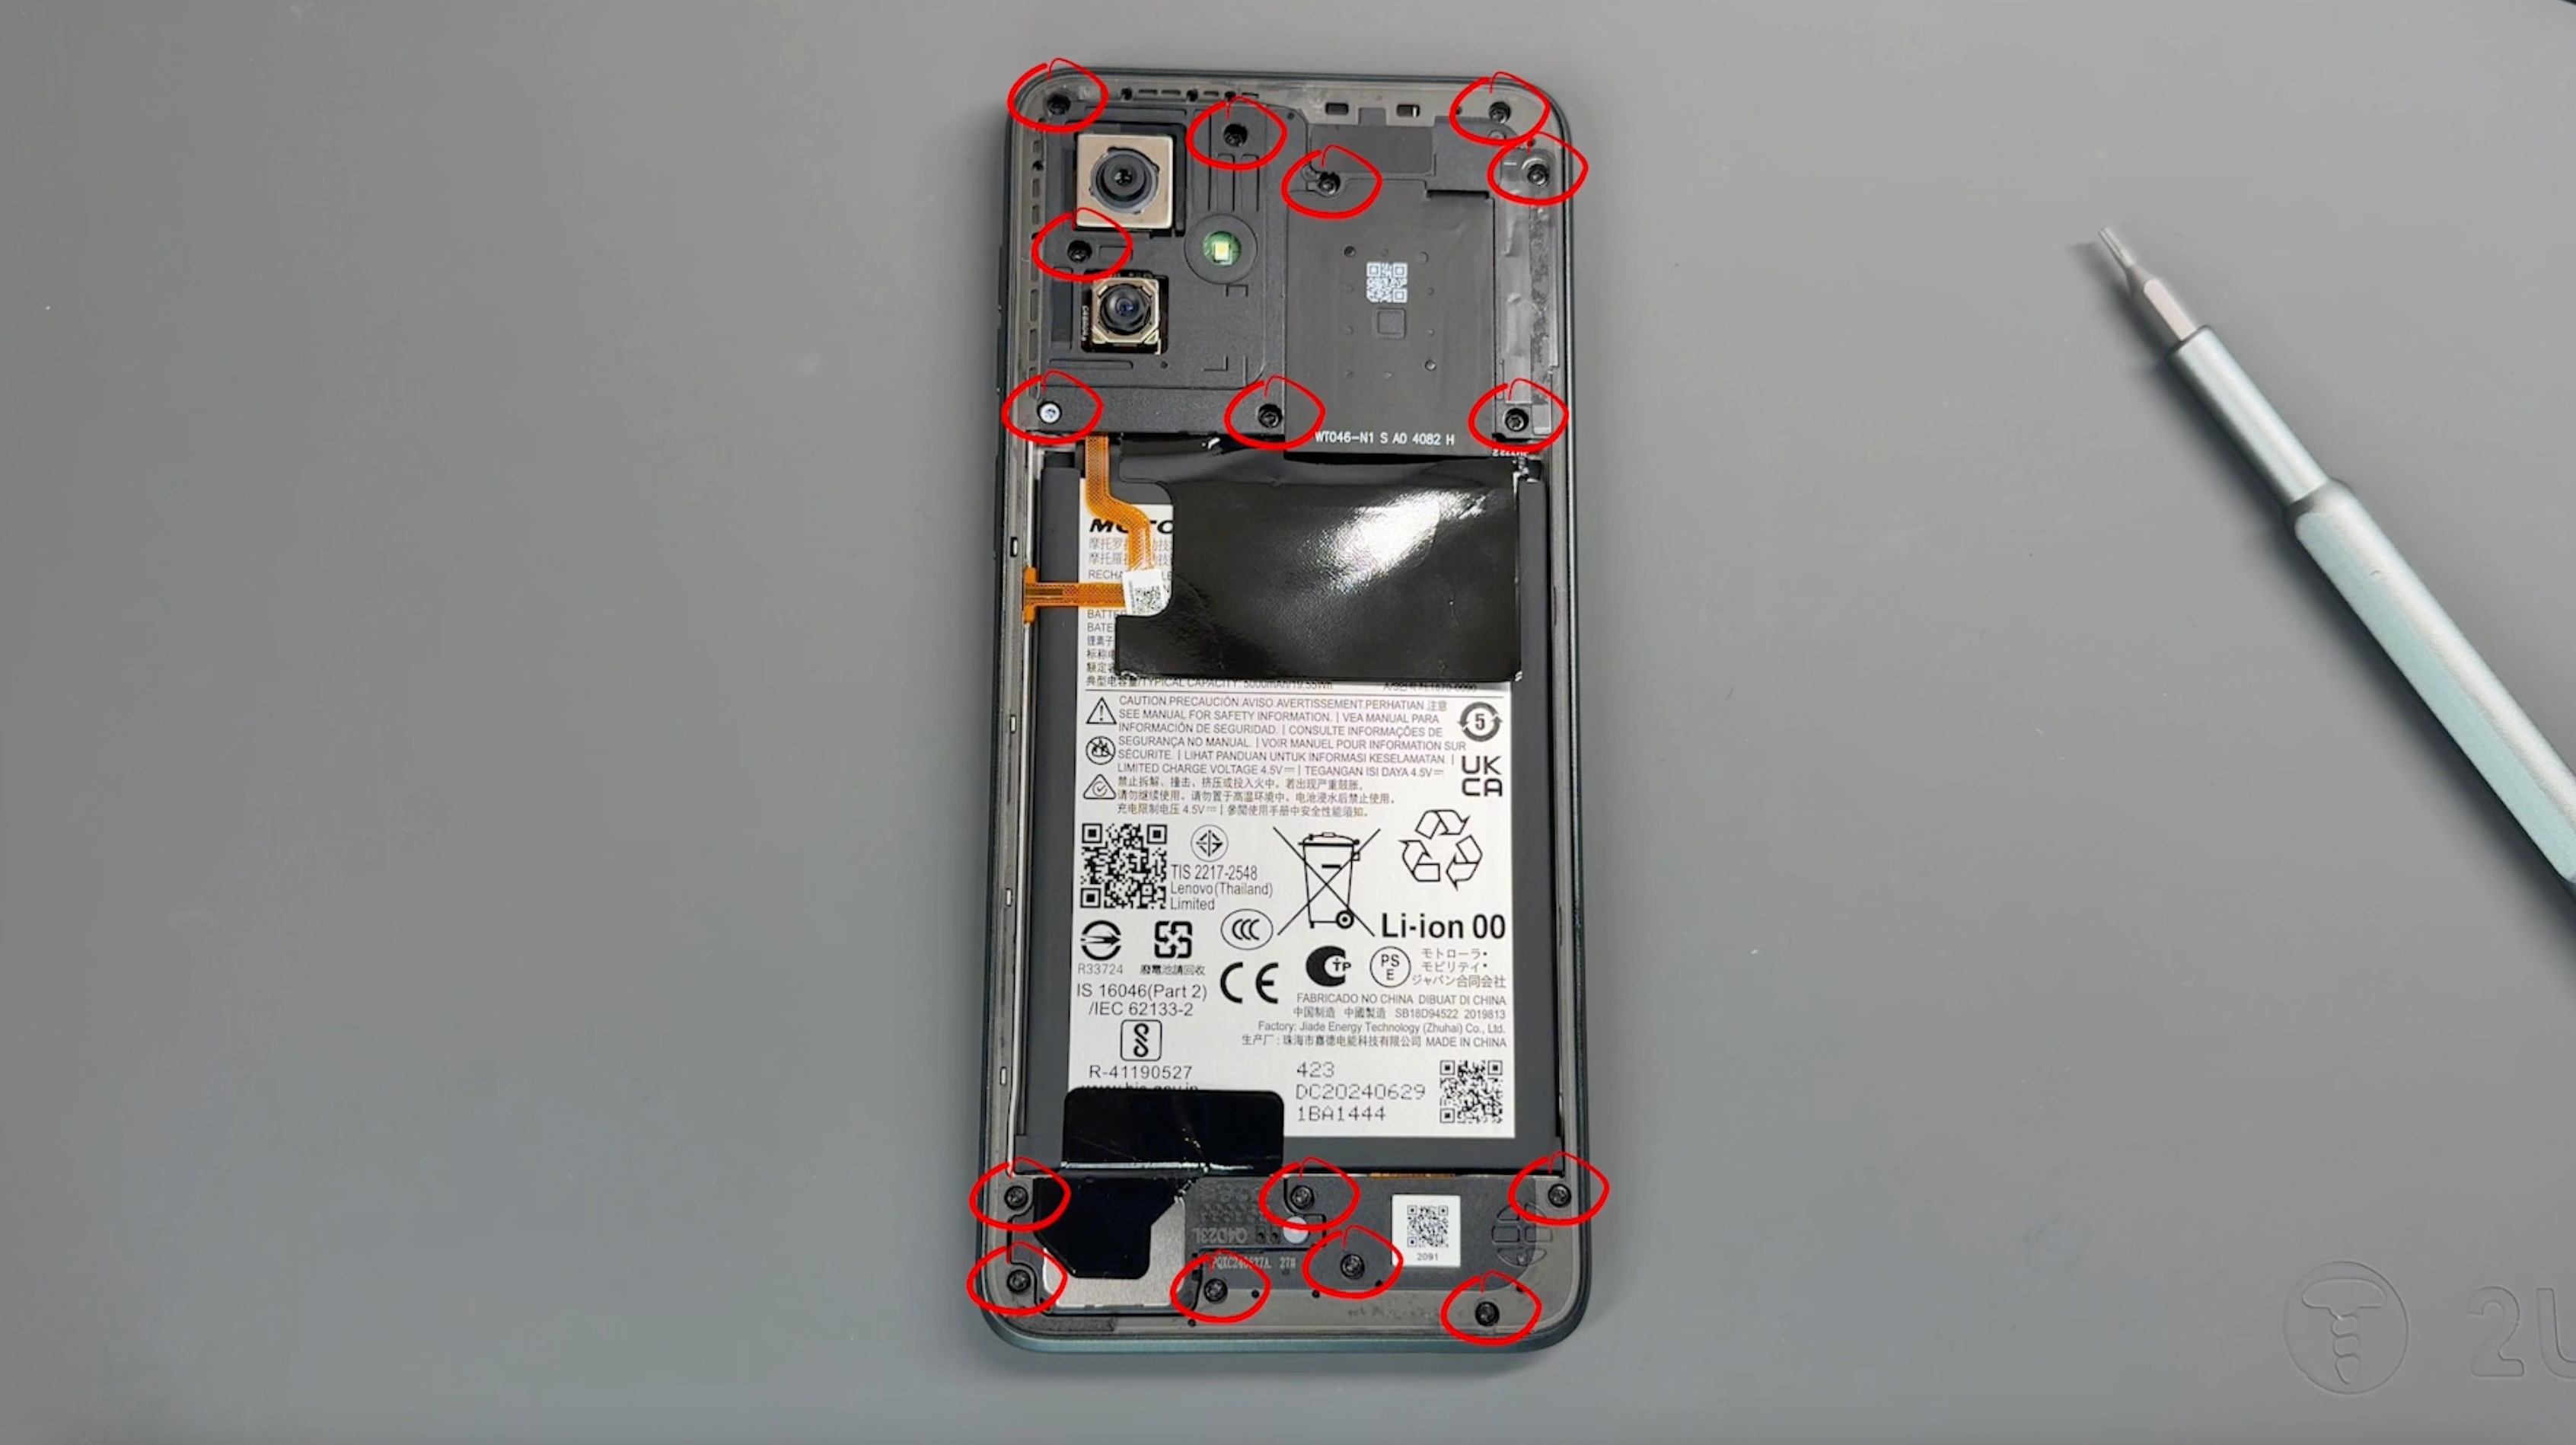
Remove the 16 screws securing the frame; don't worry, all screws are the same size. Be sure to keep them safe and avoid placing them near the edge of your workspace.
Use a pry tool to create a small gap between the screen and the frame. Carefully run the tool around the perimeter of the frame to gently loosen and separate it.
CAUTION: Before fully removing the frame, be mindful of the flex cable connecting the frame to the phone.
Pivot the frame from the left side, as demonstrated in the video, and use a probe tool to gently release the connector.
- Battery Removal
Disconnect the battery connector.
Using a hairdryer on a medium setting or a heat gun on a low setting, gently heat the front of the phone to soften the adhesive (DO NOT apply heat directly to the battery),
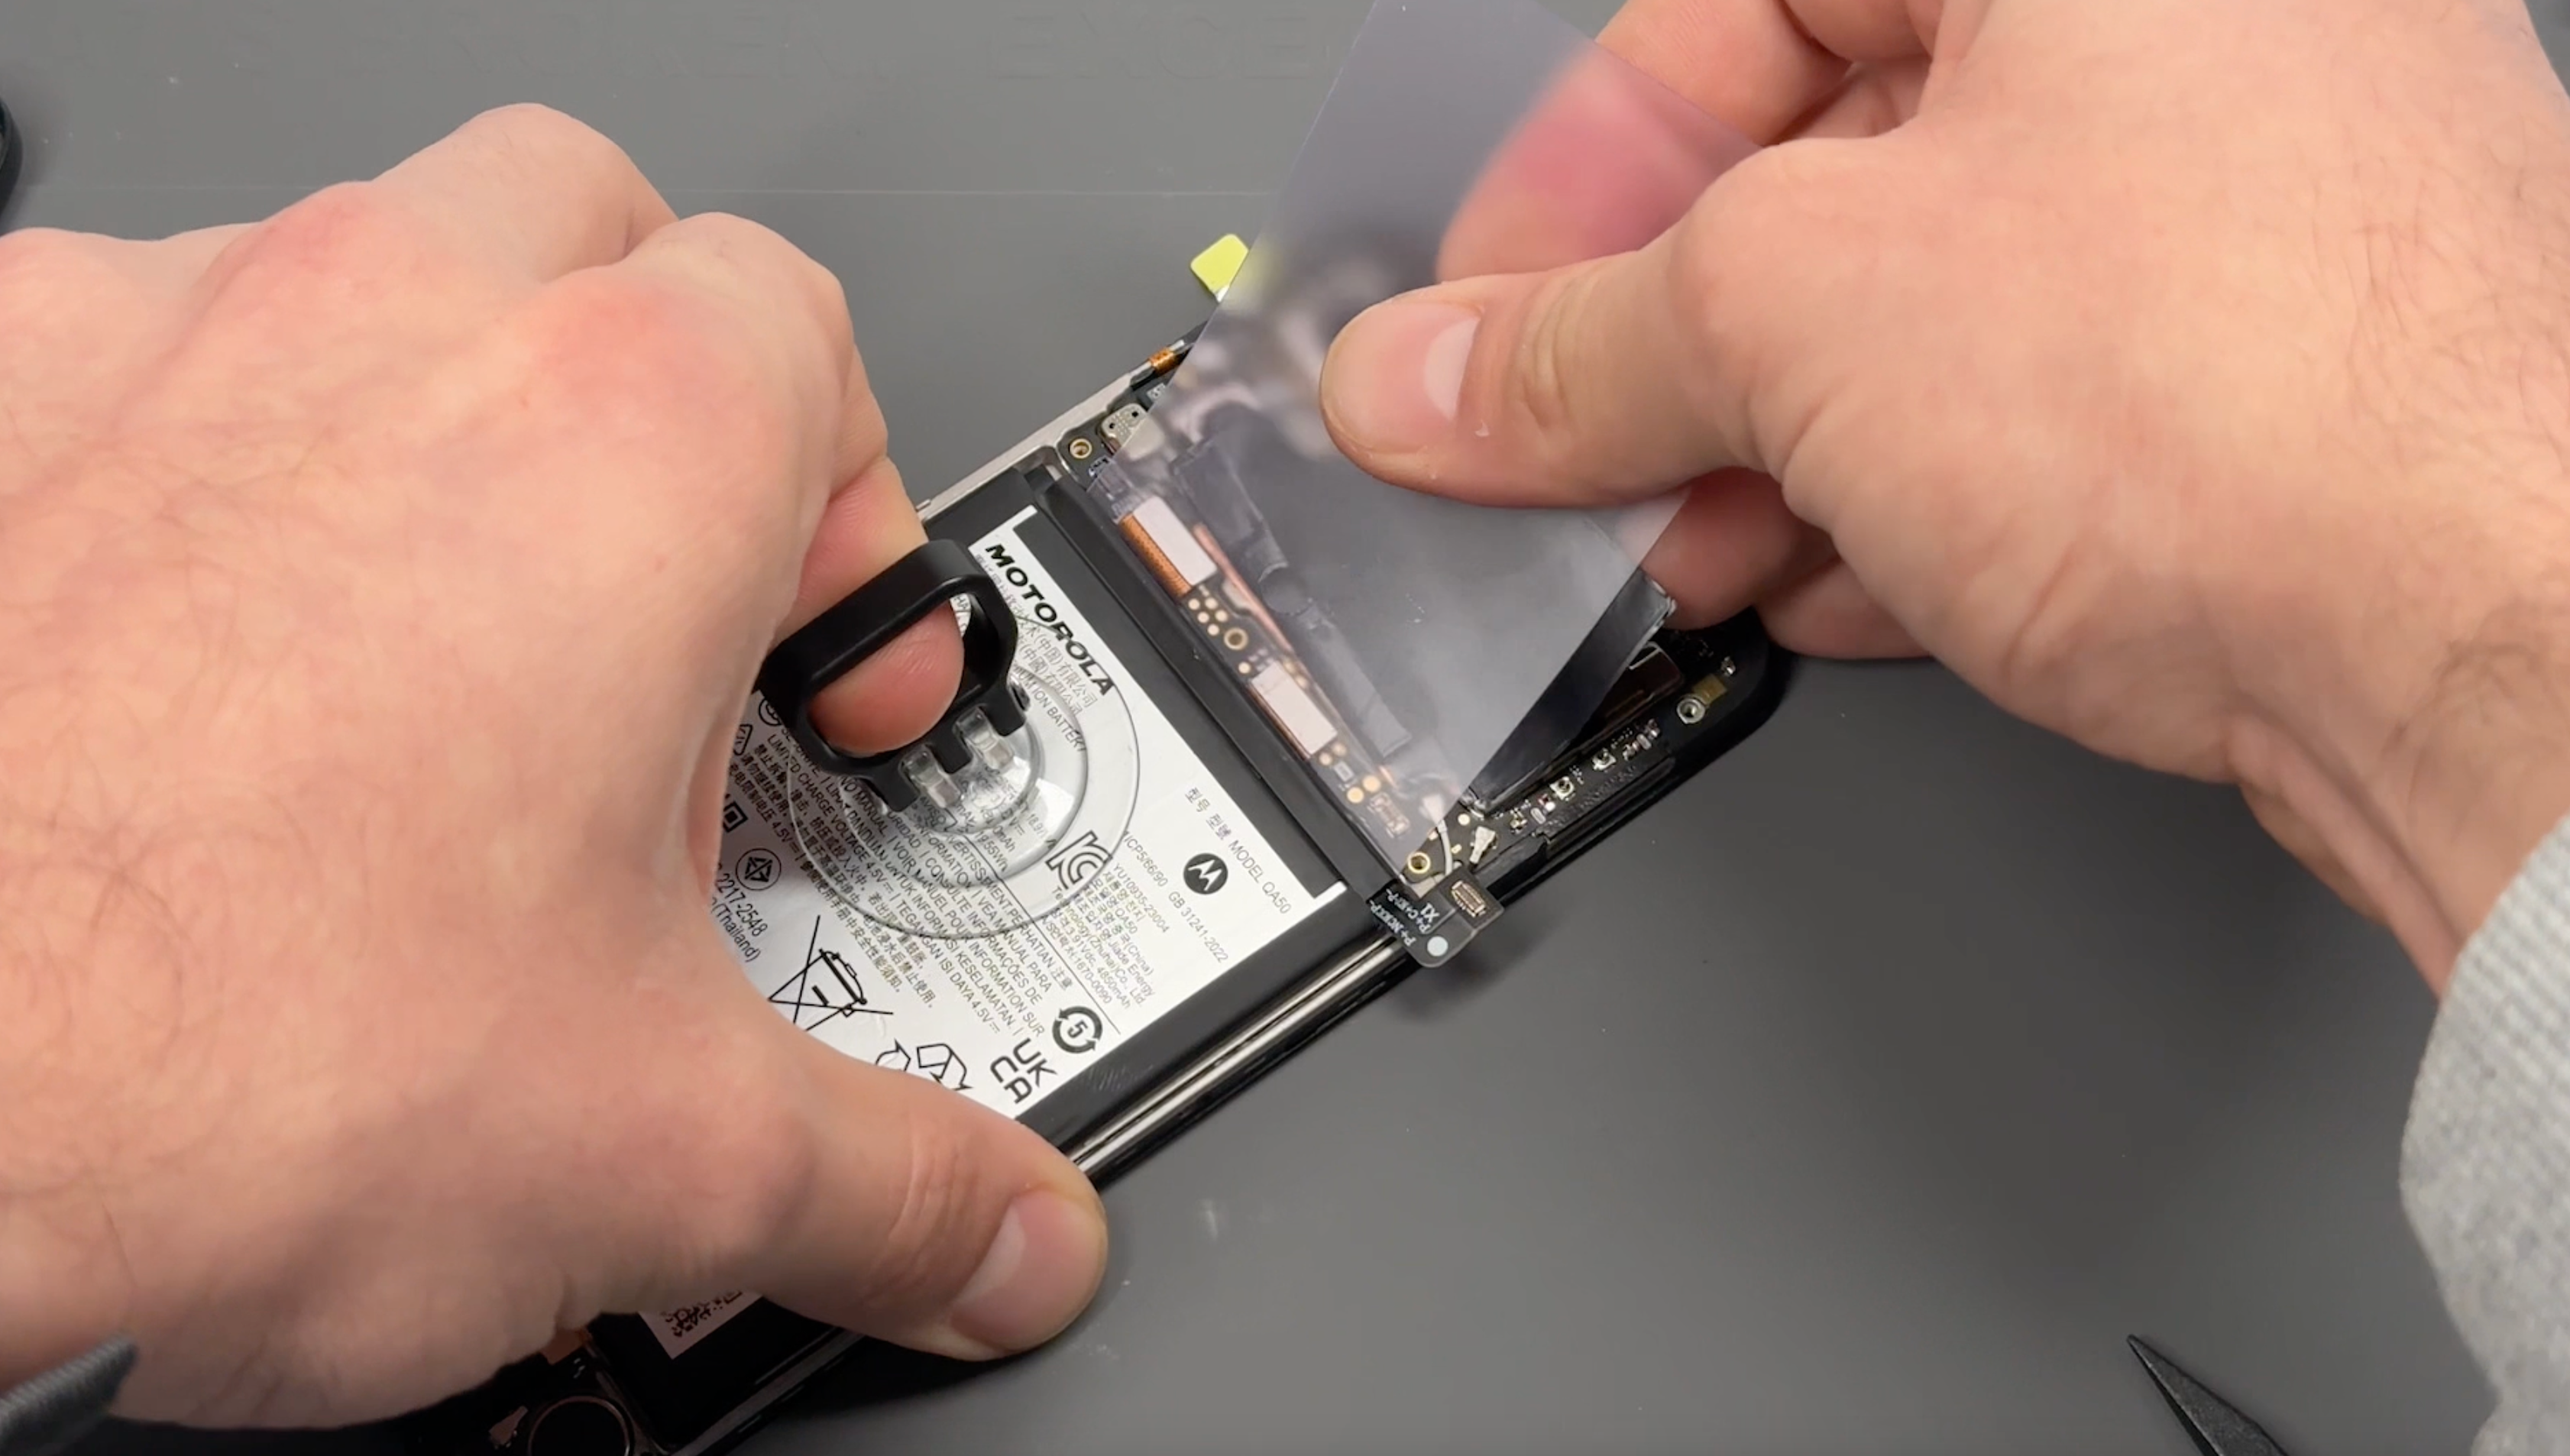
If your battery has the Easy Removal System, peel and pull the tabe with gentile but firm pressure to lift the battery out.
If your battery doesn't have the Easy Removal System, using the pry cards, create a gap between the battery and frame, this may require a little time and additional heat.
CAUTION: Never use metal tools around the battery to avoid the risk of puncturing or damaging it.
- New Battery Installation
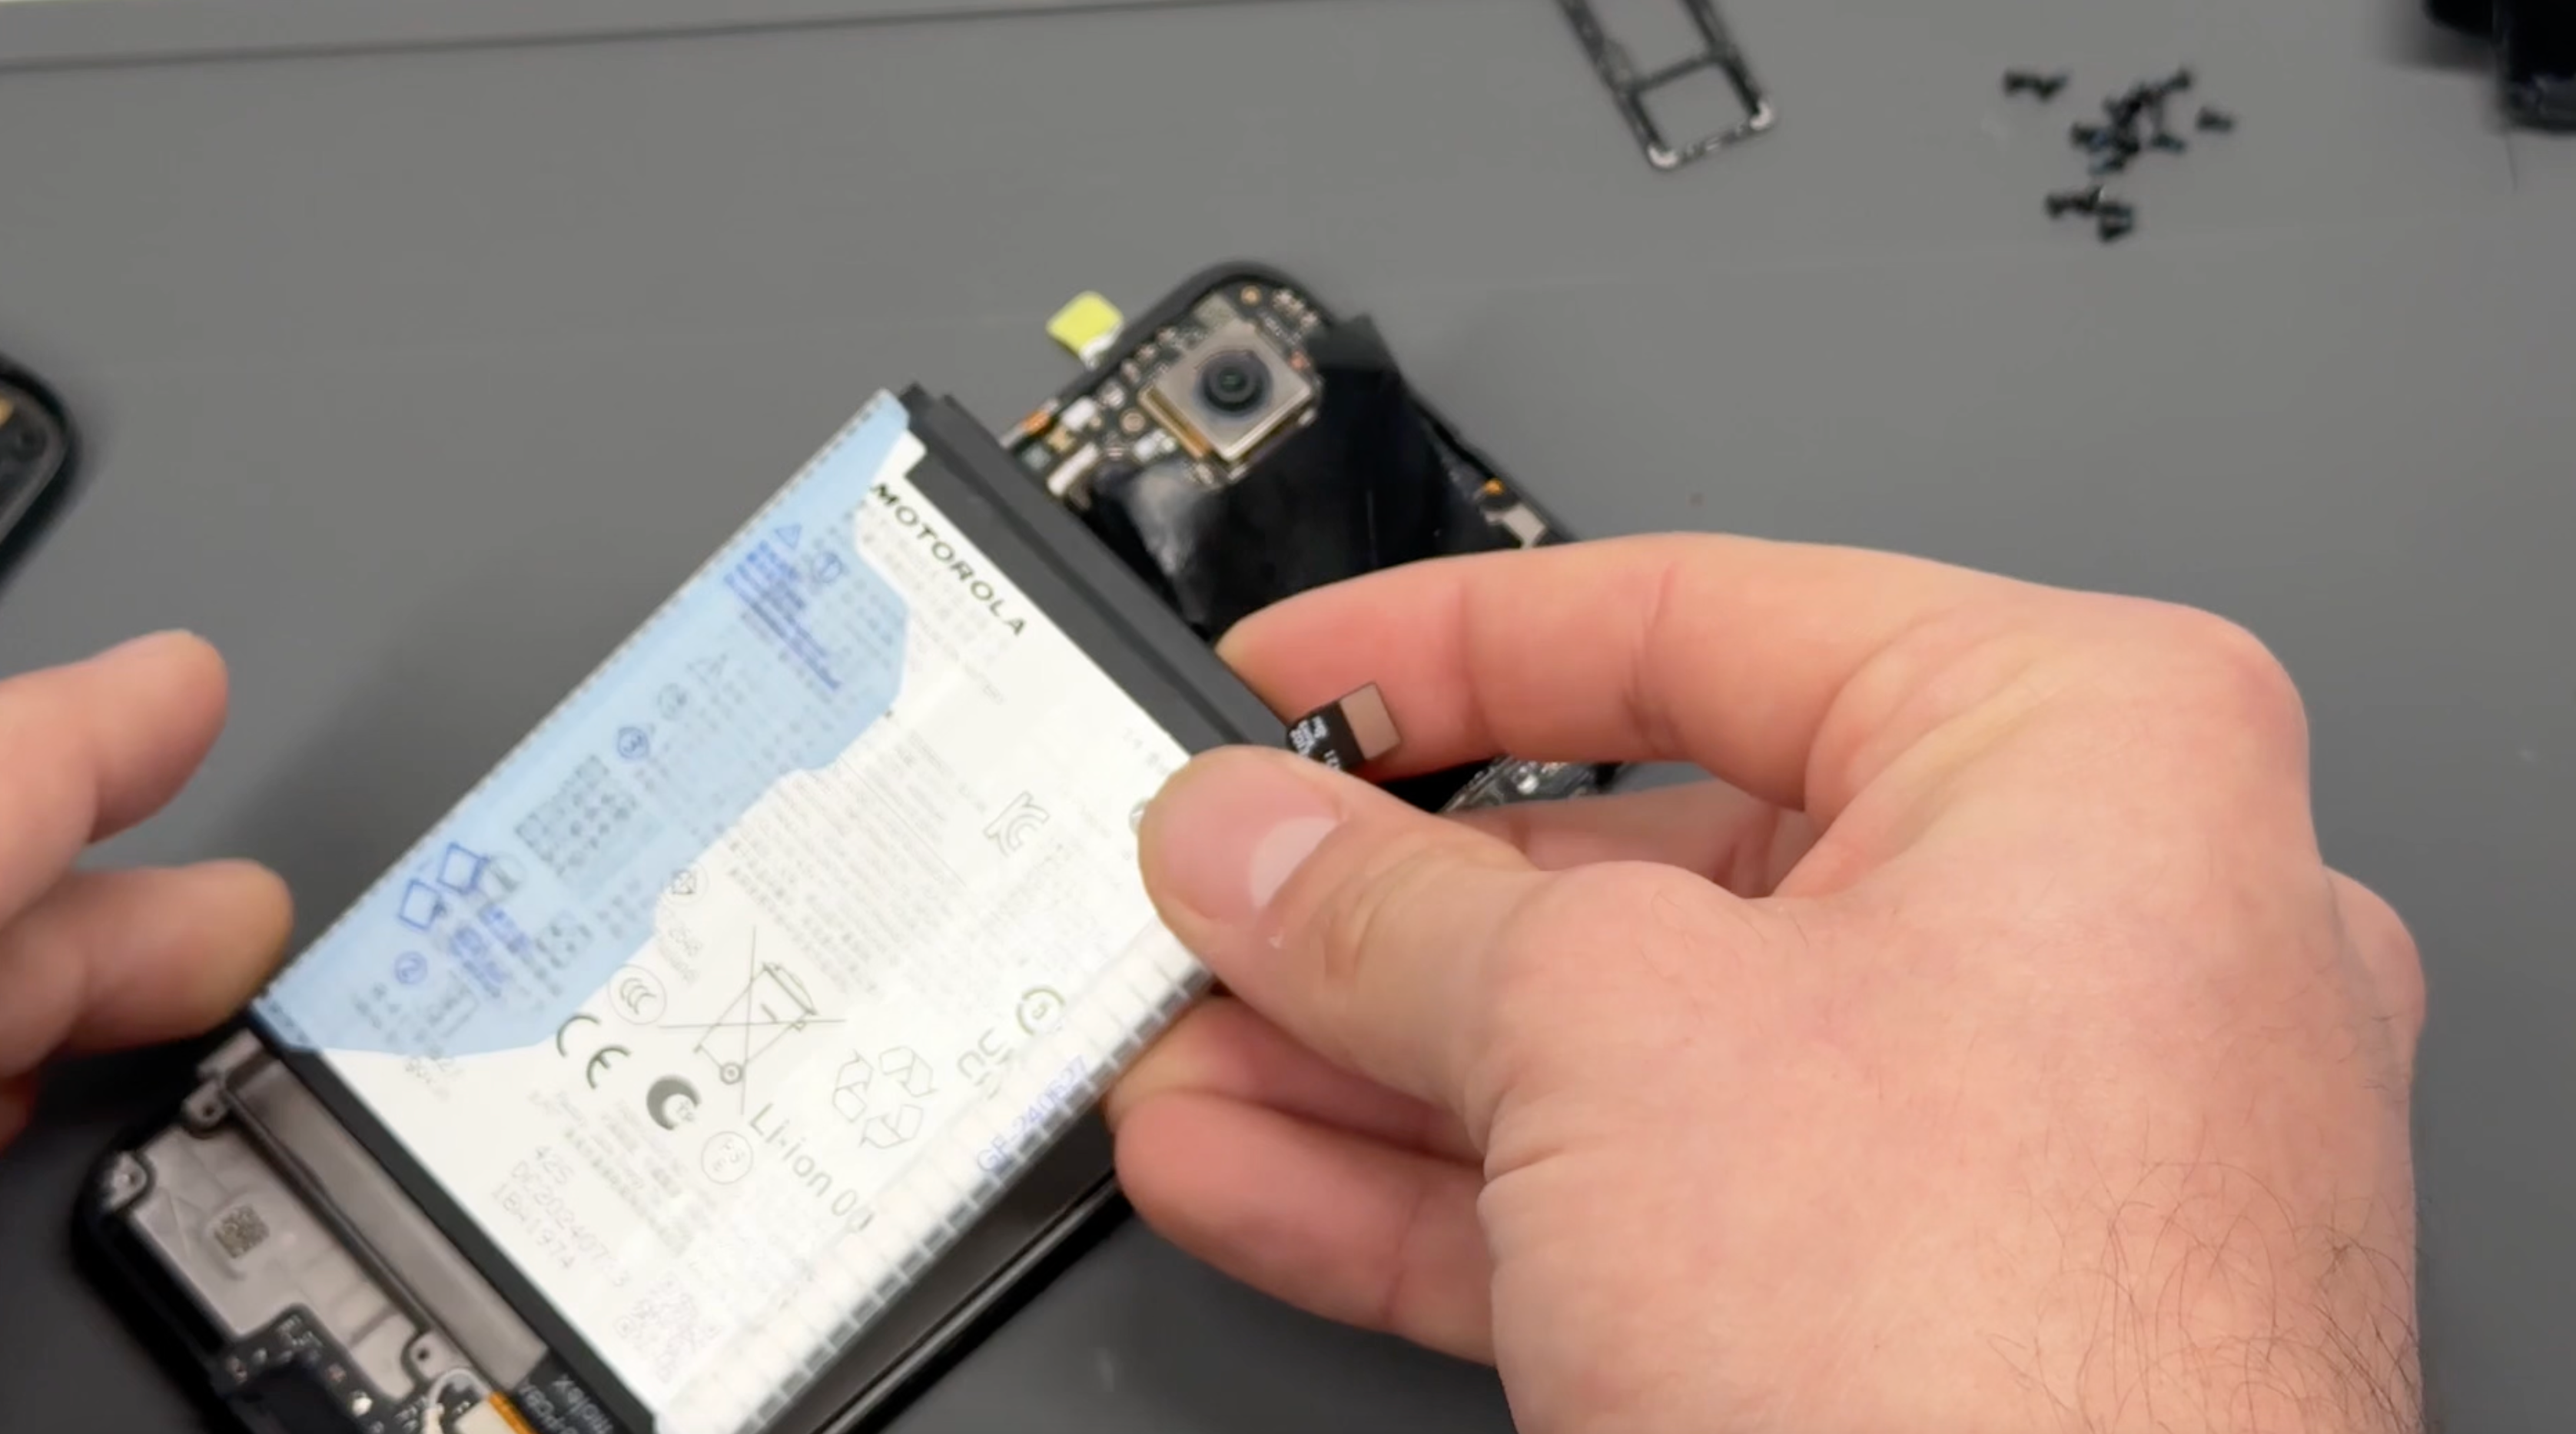
Peel off the old adhesive from the phone’s chassis. Heat can be applied if needed, but typically it can be removed by hand or with a scraping tool. Place the new adhesive directly onto the phone’s chassis (not on the battery itself) and remove the protective sticker. Install the new battery by positioning it correctly, pressing it into place, and reconnecting the battery connector securely.
- Frame Reassembly
Align the fingerprint cable with its connector on the phone’s board and press firmly until you feel it click into place.
Apply even pressure around the frame to snap it back into place, ensuring it is fully secured as you work your way around the edges.
Reinsert the screws into the frame, turning them gently until they are secure. Avoid overtightening to prevent damage.
- Battery Cover Re-installation
CAUTION: Ensure the inside of the battery cover and the camera units on the phone are free from dust or fingerprints before proceeding.
Check that the battery cover is free of any old adhesive. If any remains, simply peel it off or rub it away with your finger.
Align the new adhesive with the battery cover, ensuring proper placement, and press firmly to allow the adhesive to bond securely to the cover.
Carefully remove the protective film from the adhesive, peeling slowly to prevent it from lifting.
Reattach the battery cover to the phone, aligning it properly, and apply firm pressure around the edges of the device to ensure a secure seal.
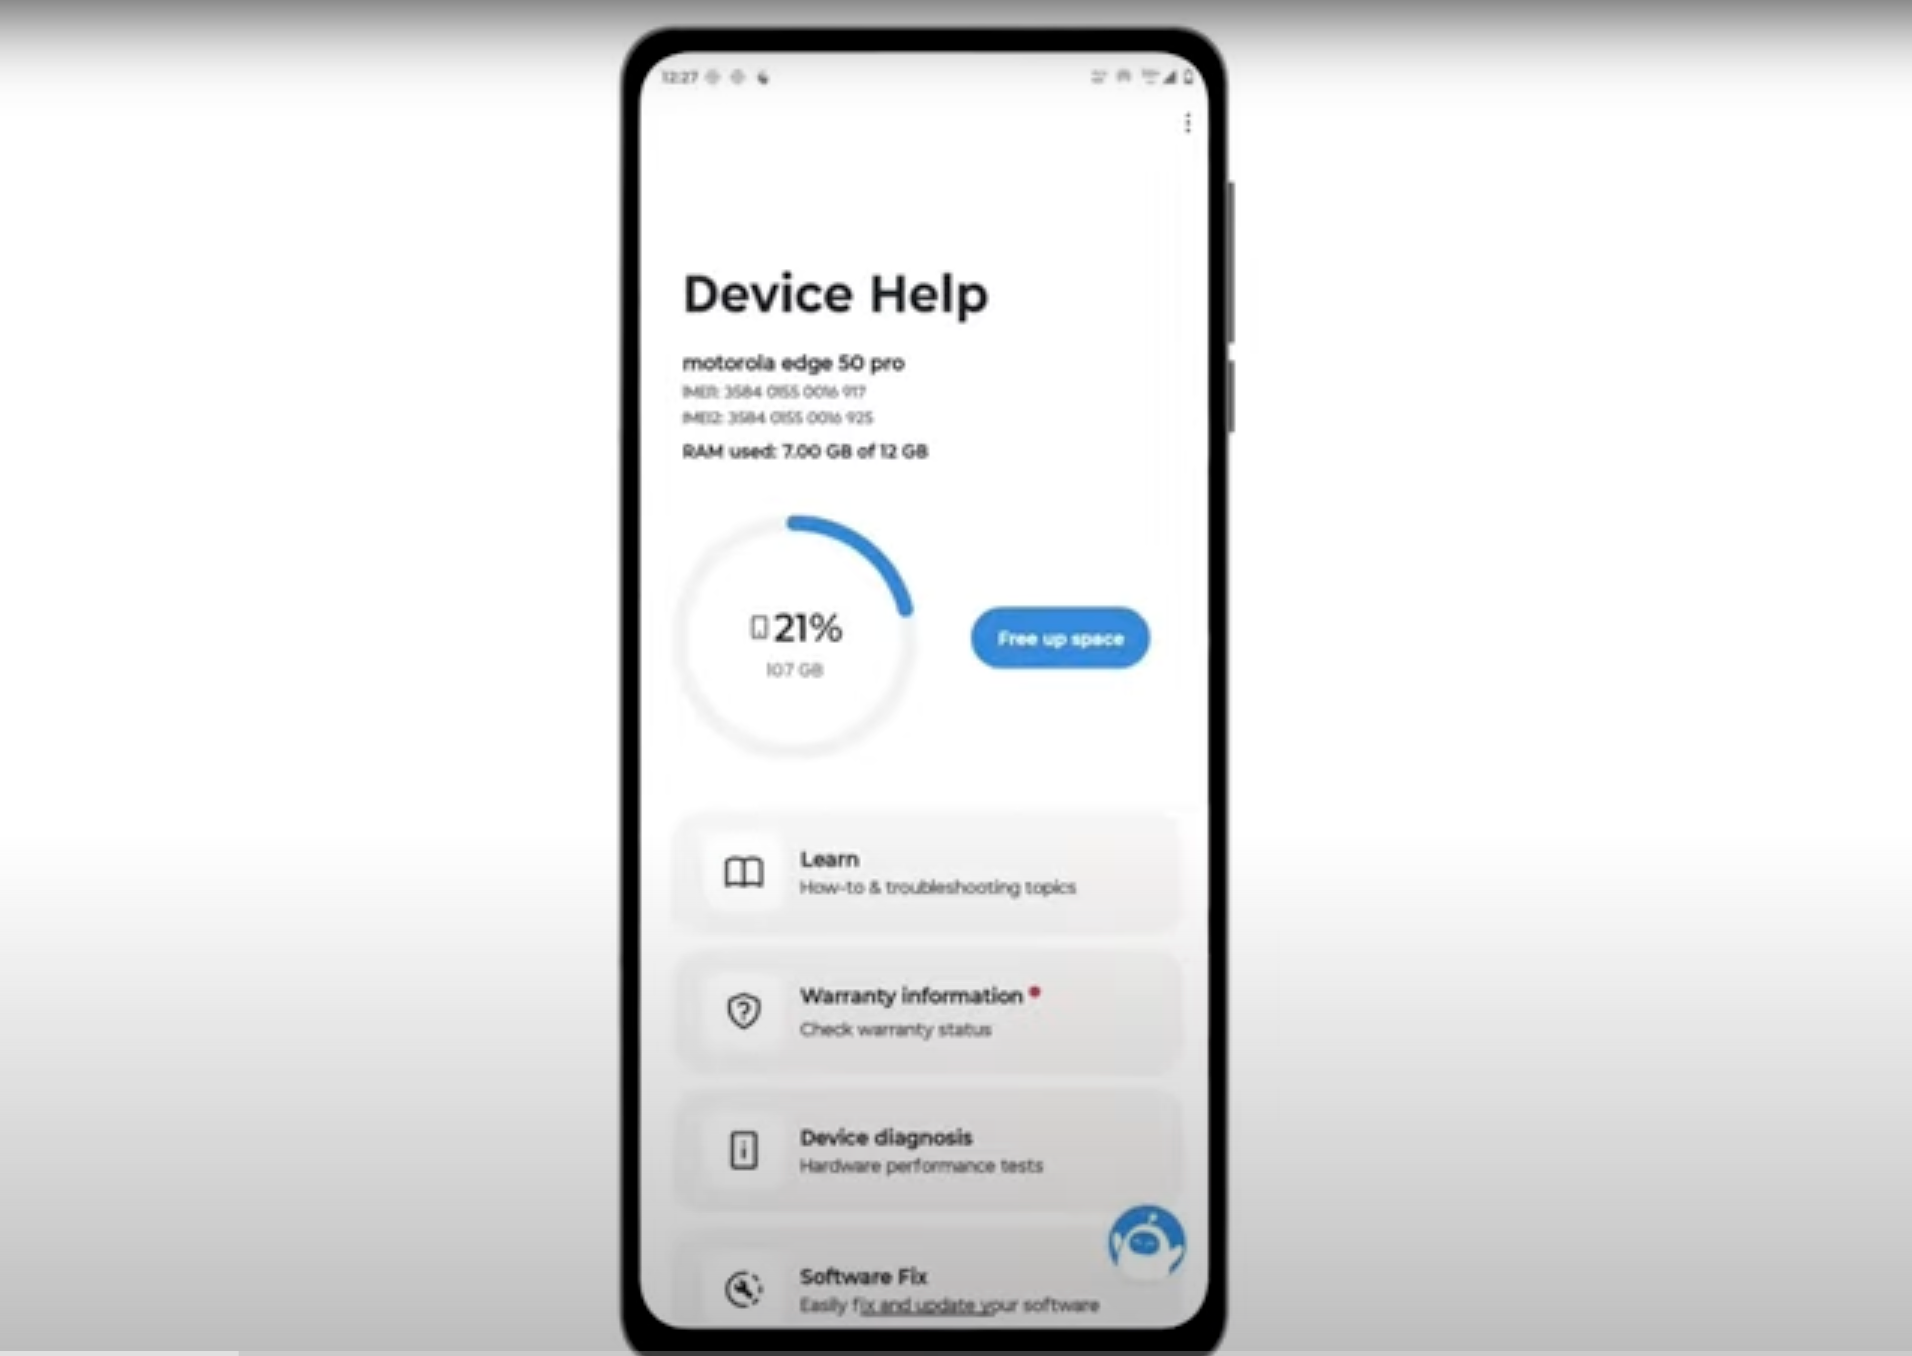
- Final Testing & Device Help App
Download and run Motorola Smart Assist to fully test your device and follow any required configuration.