This guide provides step-by-step instructions on replacing the charging port on your Moto G55. The charging port assembly also includes additional components, such as the headphone jack and main microphone, which will be replaced as part of this process.
moto G55 repair

Charge Port Replacement - g55
20-30 MINUTES
VIDEO / PHOTO GUIDE
Safety first
Parts Used
Tools & Consumables Required
moto g55 5G | Battery Cover / Rear Panel Adhesive | Forest Grey (Desert Sage) | 5D78C28715
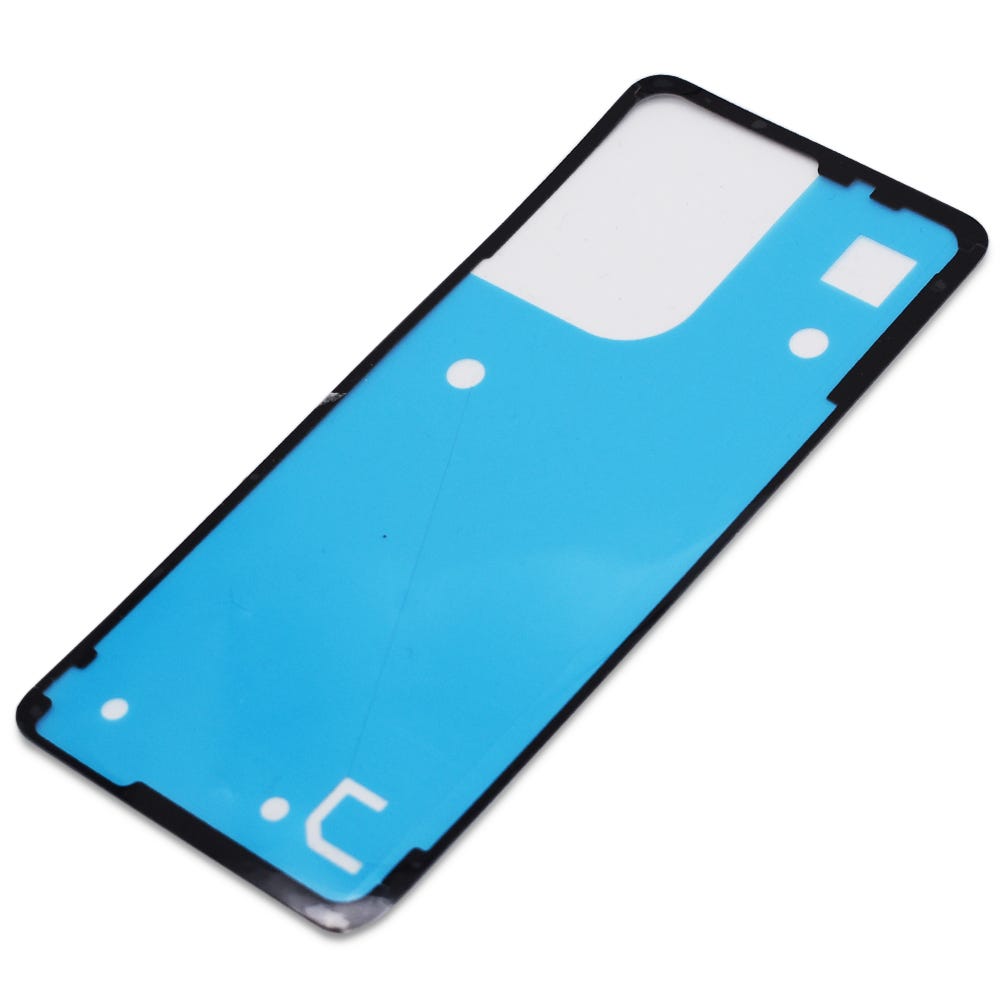
RBSKU23146 5D78C28715
£2.88
moto g55 5G | Flash Board Adhesive | 5D78C23274

RBSKU23152 5D78C23274
£1.21
Motorola Complete Home Repair Tool Kit
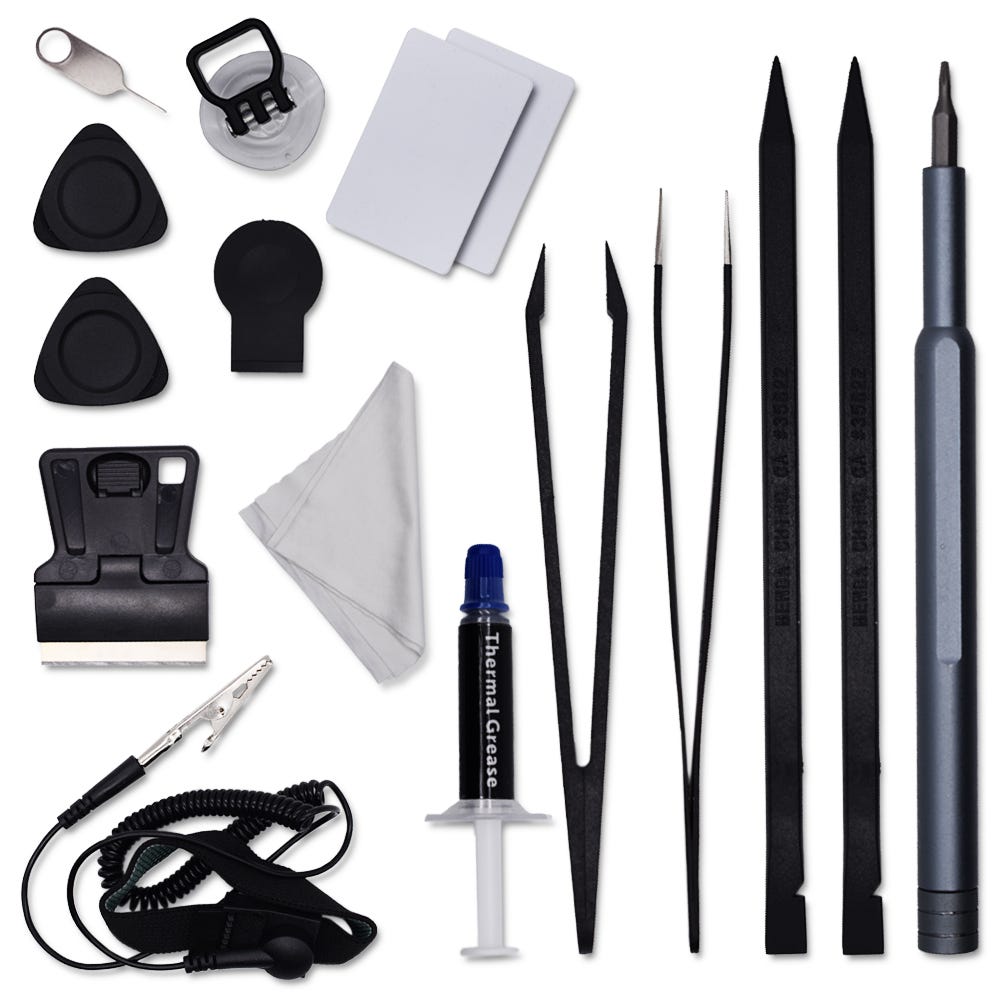
RBSKU23227 RBSKU23227
£12.46
Technician notes:
Avoid touching the camera lens on the camera unit or the inside of the battery cover to prevent smudges or damage. Additionally, note that the small coaxial cables can be tricky to handle; the connectors on the charging port are delicate and can be easily damaged, so proceed with caution during this step!
Avoid touching the camera lens on the camera unit or the inside of the battery cover to prevent smudges or damage. Additionally, note that the small coaxial cables can be tricky to handle; the connectors on the charging port are delicate and can be easily damaged, so proceed with caution during this step!
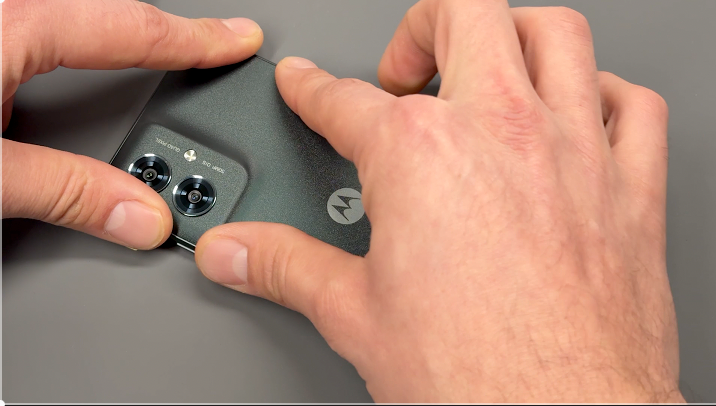
- Full Battery Cover Removal

Use the SIM card ejection tool to remove the SIM card tray and SIM card.
Apply heat using a hairdryer on a medium setting or a heat gun on a low setting until the back of the phone is warm to the touch.
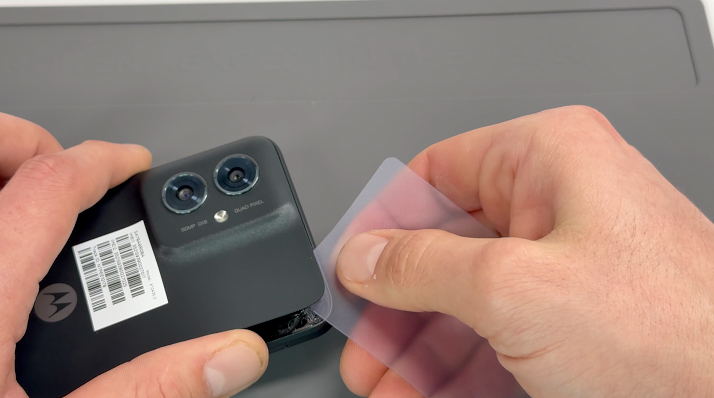
Using a thin, solid prying tool or a handled blade, gently pry the area between the battery cover and the frame until a small gap is created.
Insert a plastic card, playing card, or rigid card into the gap and carefully slide it around the edges to break the adhesive seal securing the battery cover. Once the seal is fully broken, remove the battery cover.
Clean off any remaining adhesive from the frame using a probe tool or by gently pulling and rubbing it away with your finger.
- Frame Separation
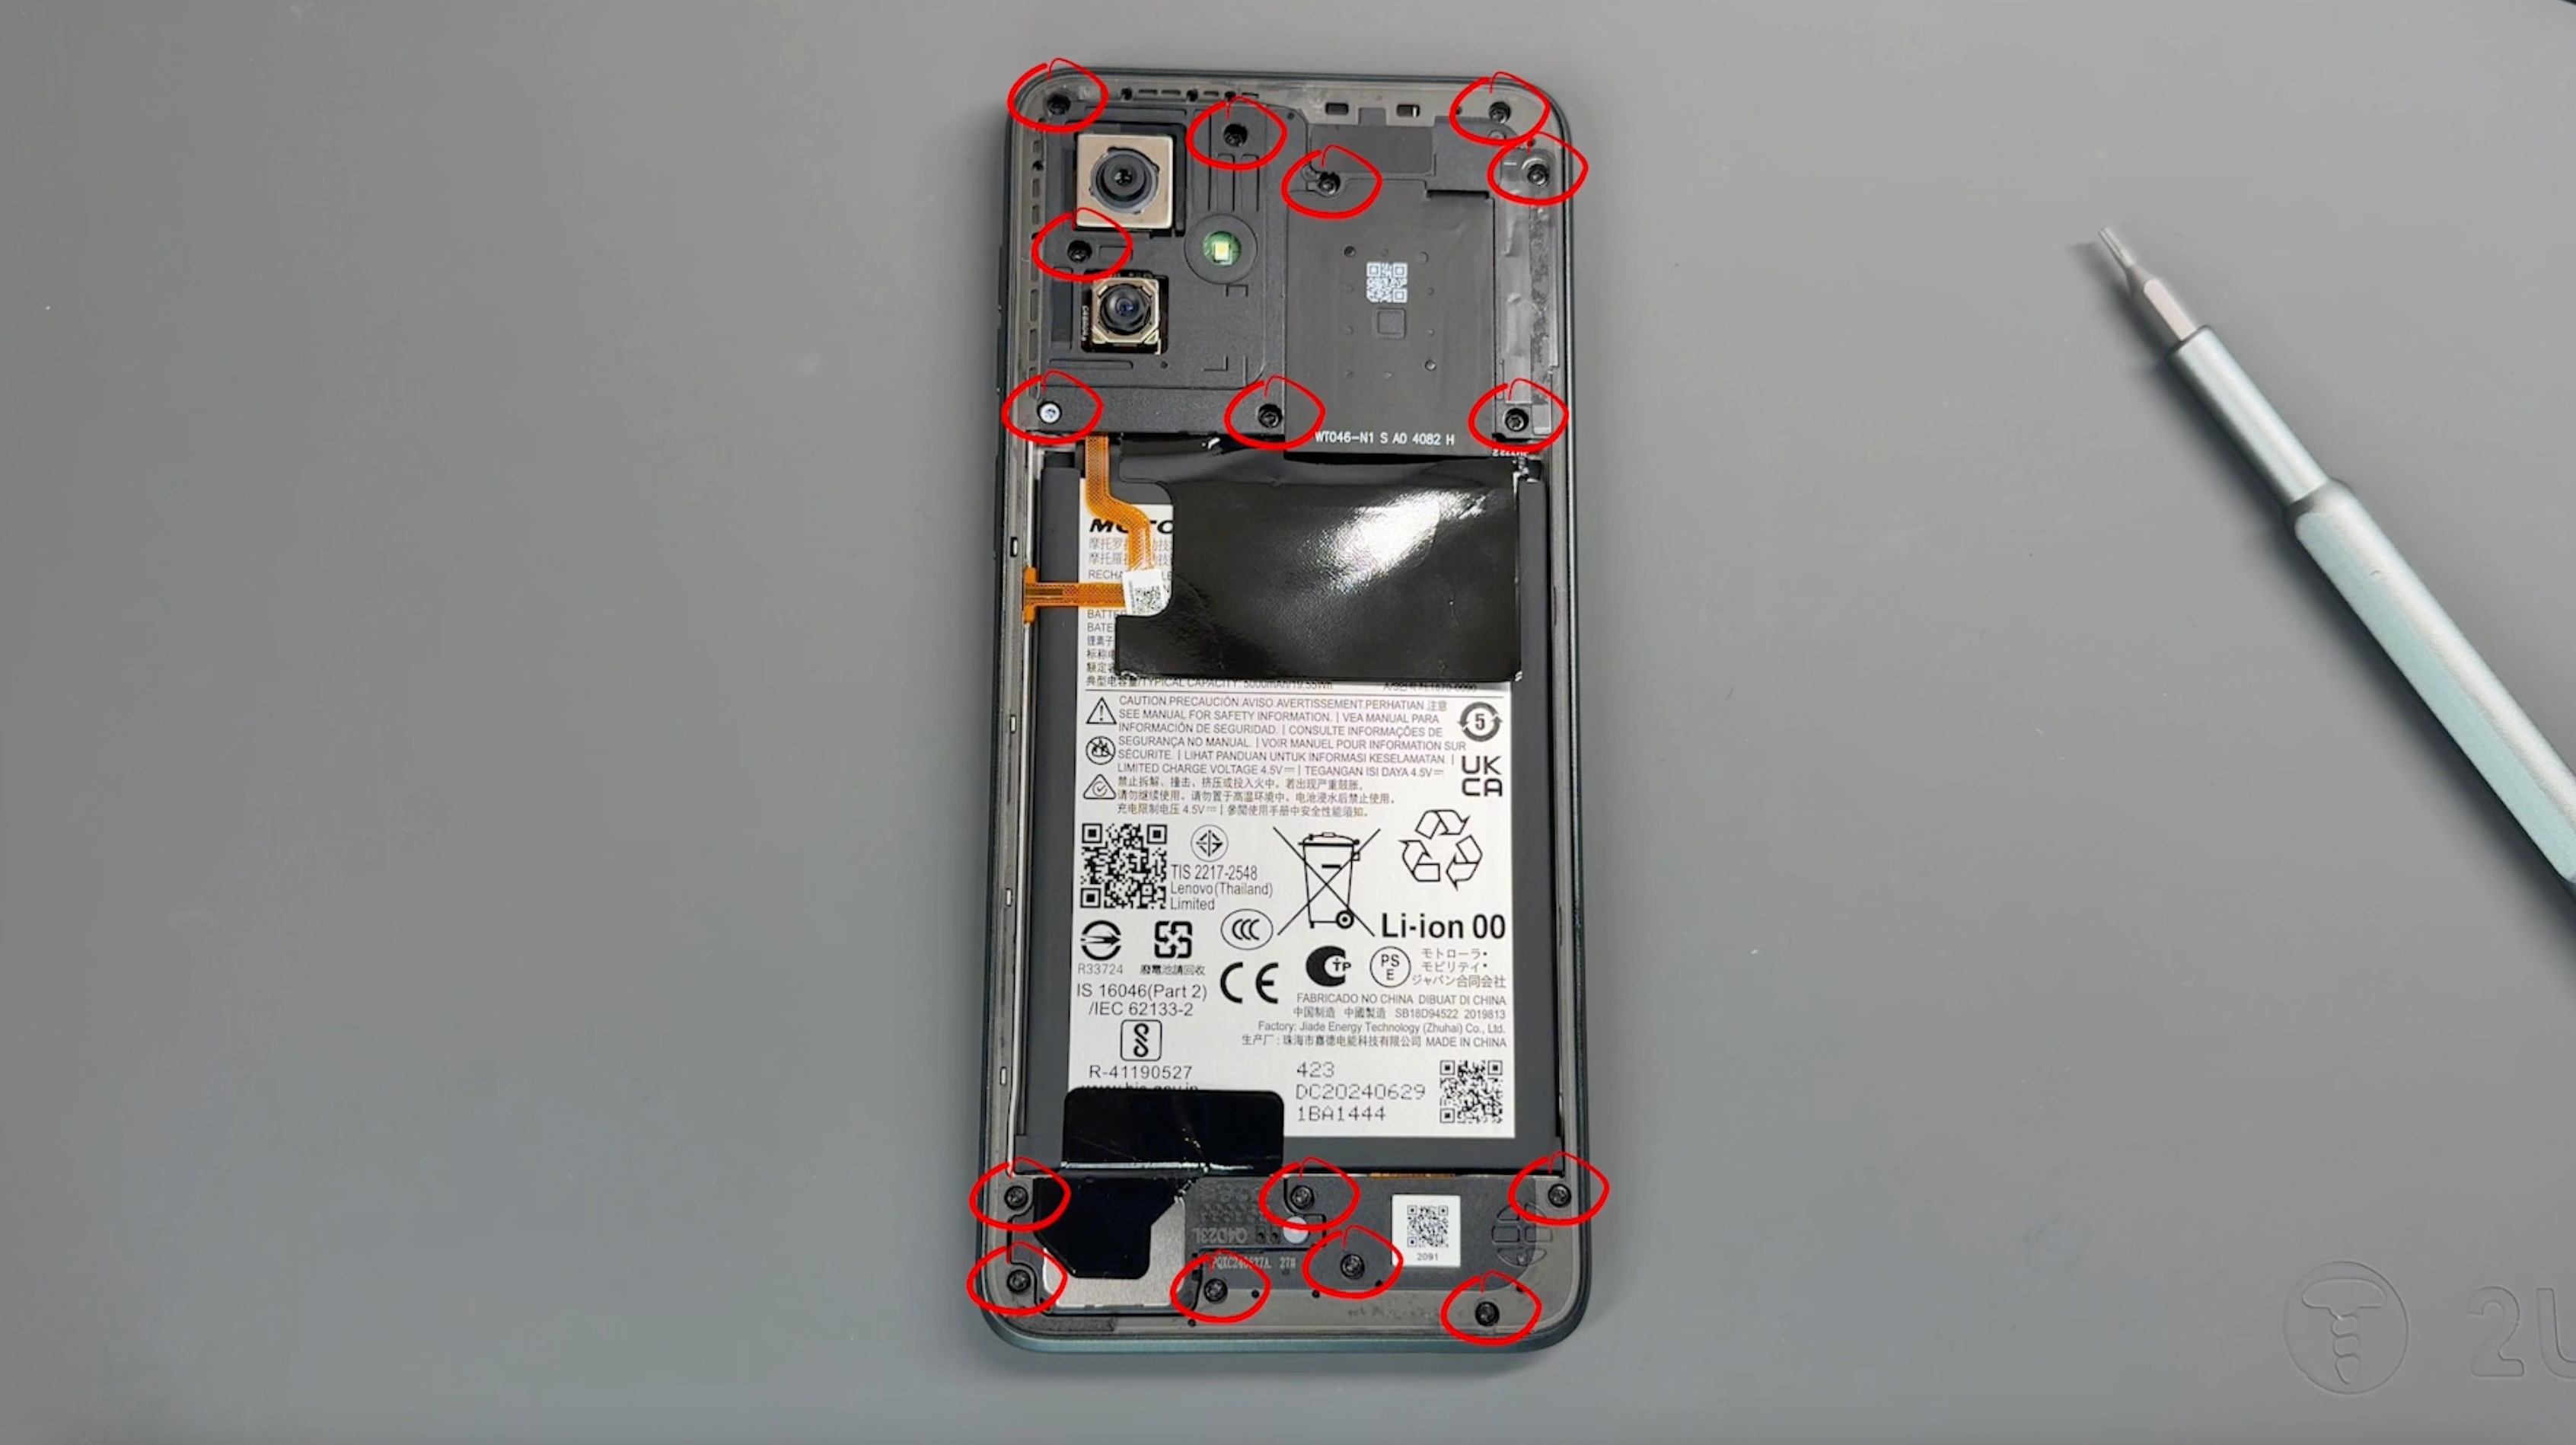
Remove the 16 screws securing the frame; don't worry, all screws are the same size. Be sure to keep them safe and avoid placing them near the edge of your workspace.
Use a pry tool to create a small gap between the screen and the frame. Carefully run the tool around the perimeter of the frame to gently loosen and separate it.
CAUTION: Before fully removing the frame, be mindful of the flex cable connecting the frame to the phone.
Pivot the frame from the left side, as demonstrated in the video, and use a probe tool to gently release the connector.
- Charge Port Removal
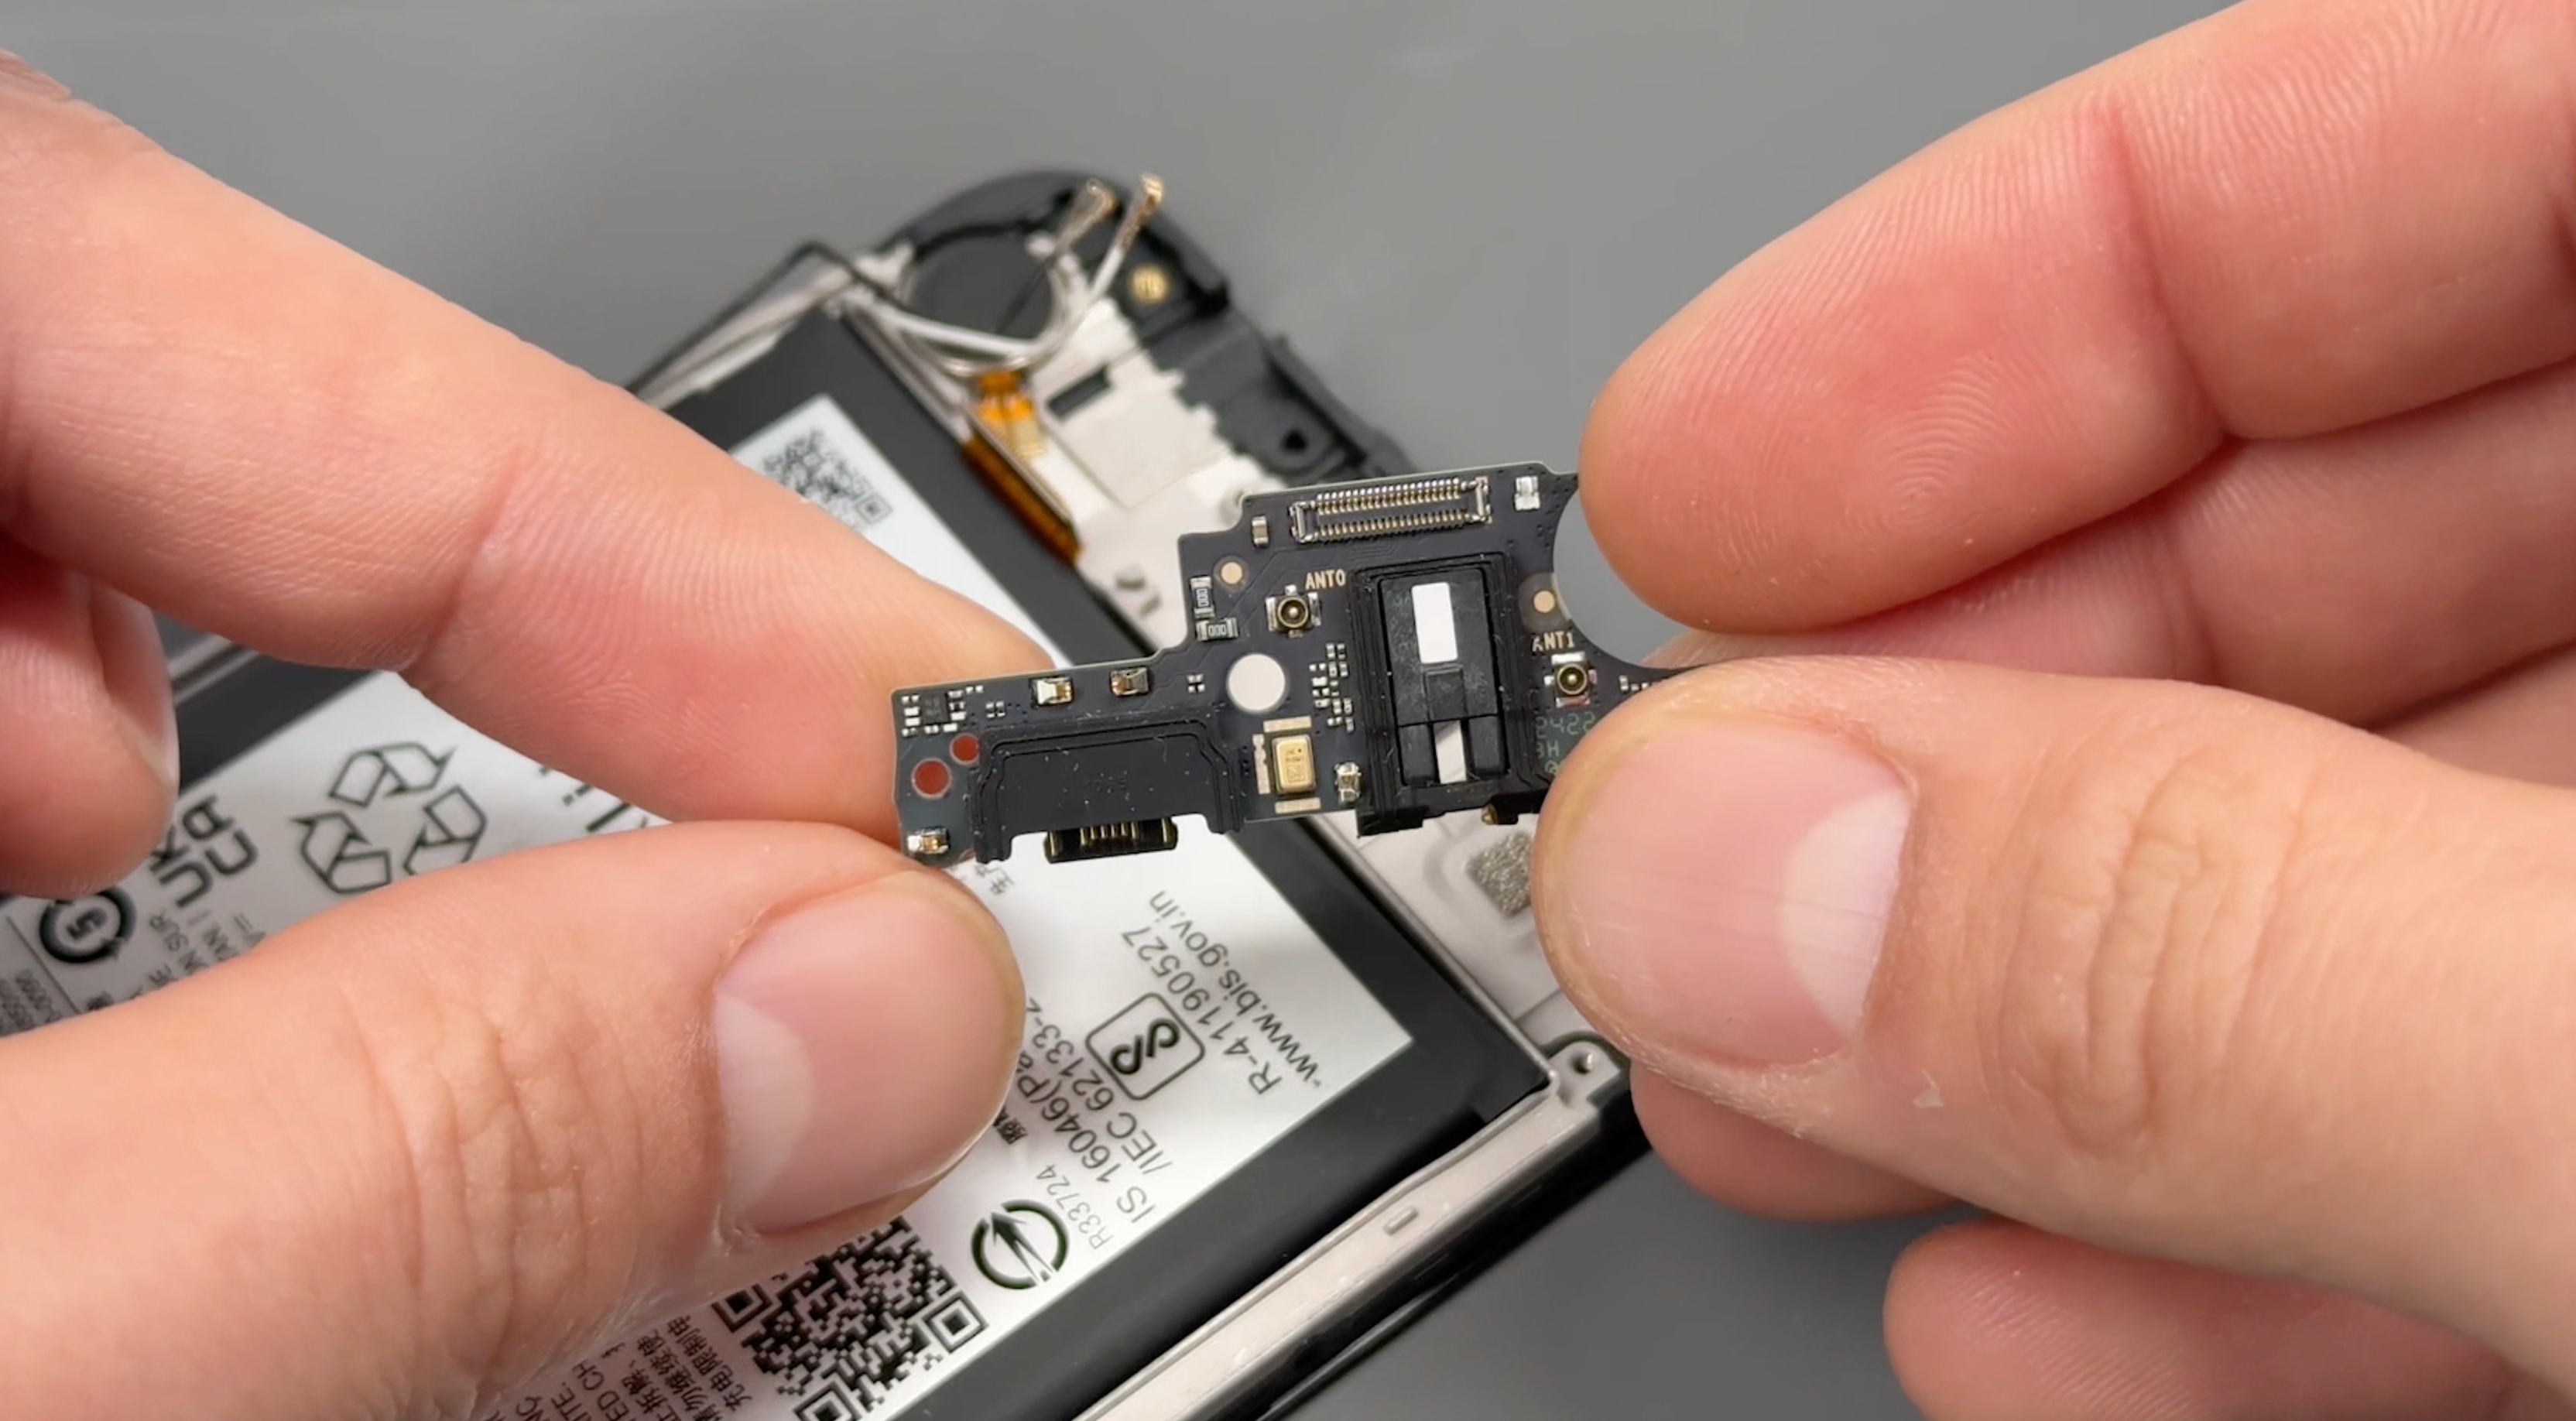
Lift the black shielding sheet and disconnect the battery connector. At the bottom of the phone, carefully disconnect the black and white rounded coaxial cables, along with the flat connection flex cable, and set aside the loudspeaker.
Gently lift the charging port from the rear to release it, and remove the rubber grommets around the charging port and headphone jack. Transfer these grommets to your new charging port as demonstrated in the video.
- Charge Port Re-install
Place the charging port back into the phone and apply gentle pressure to secure it.
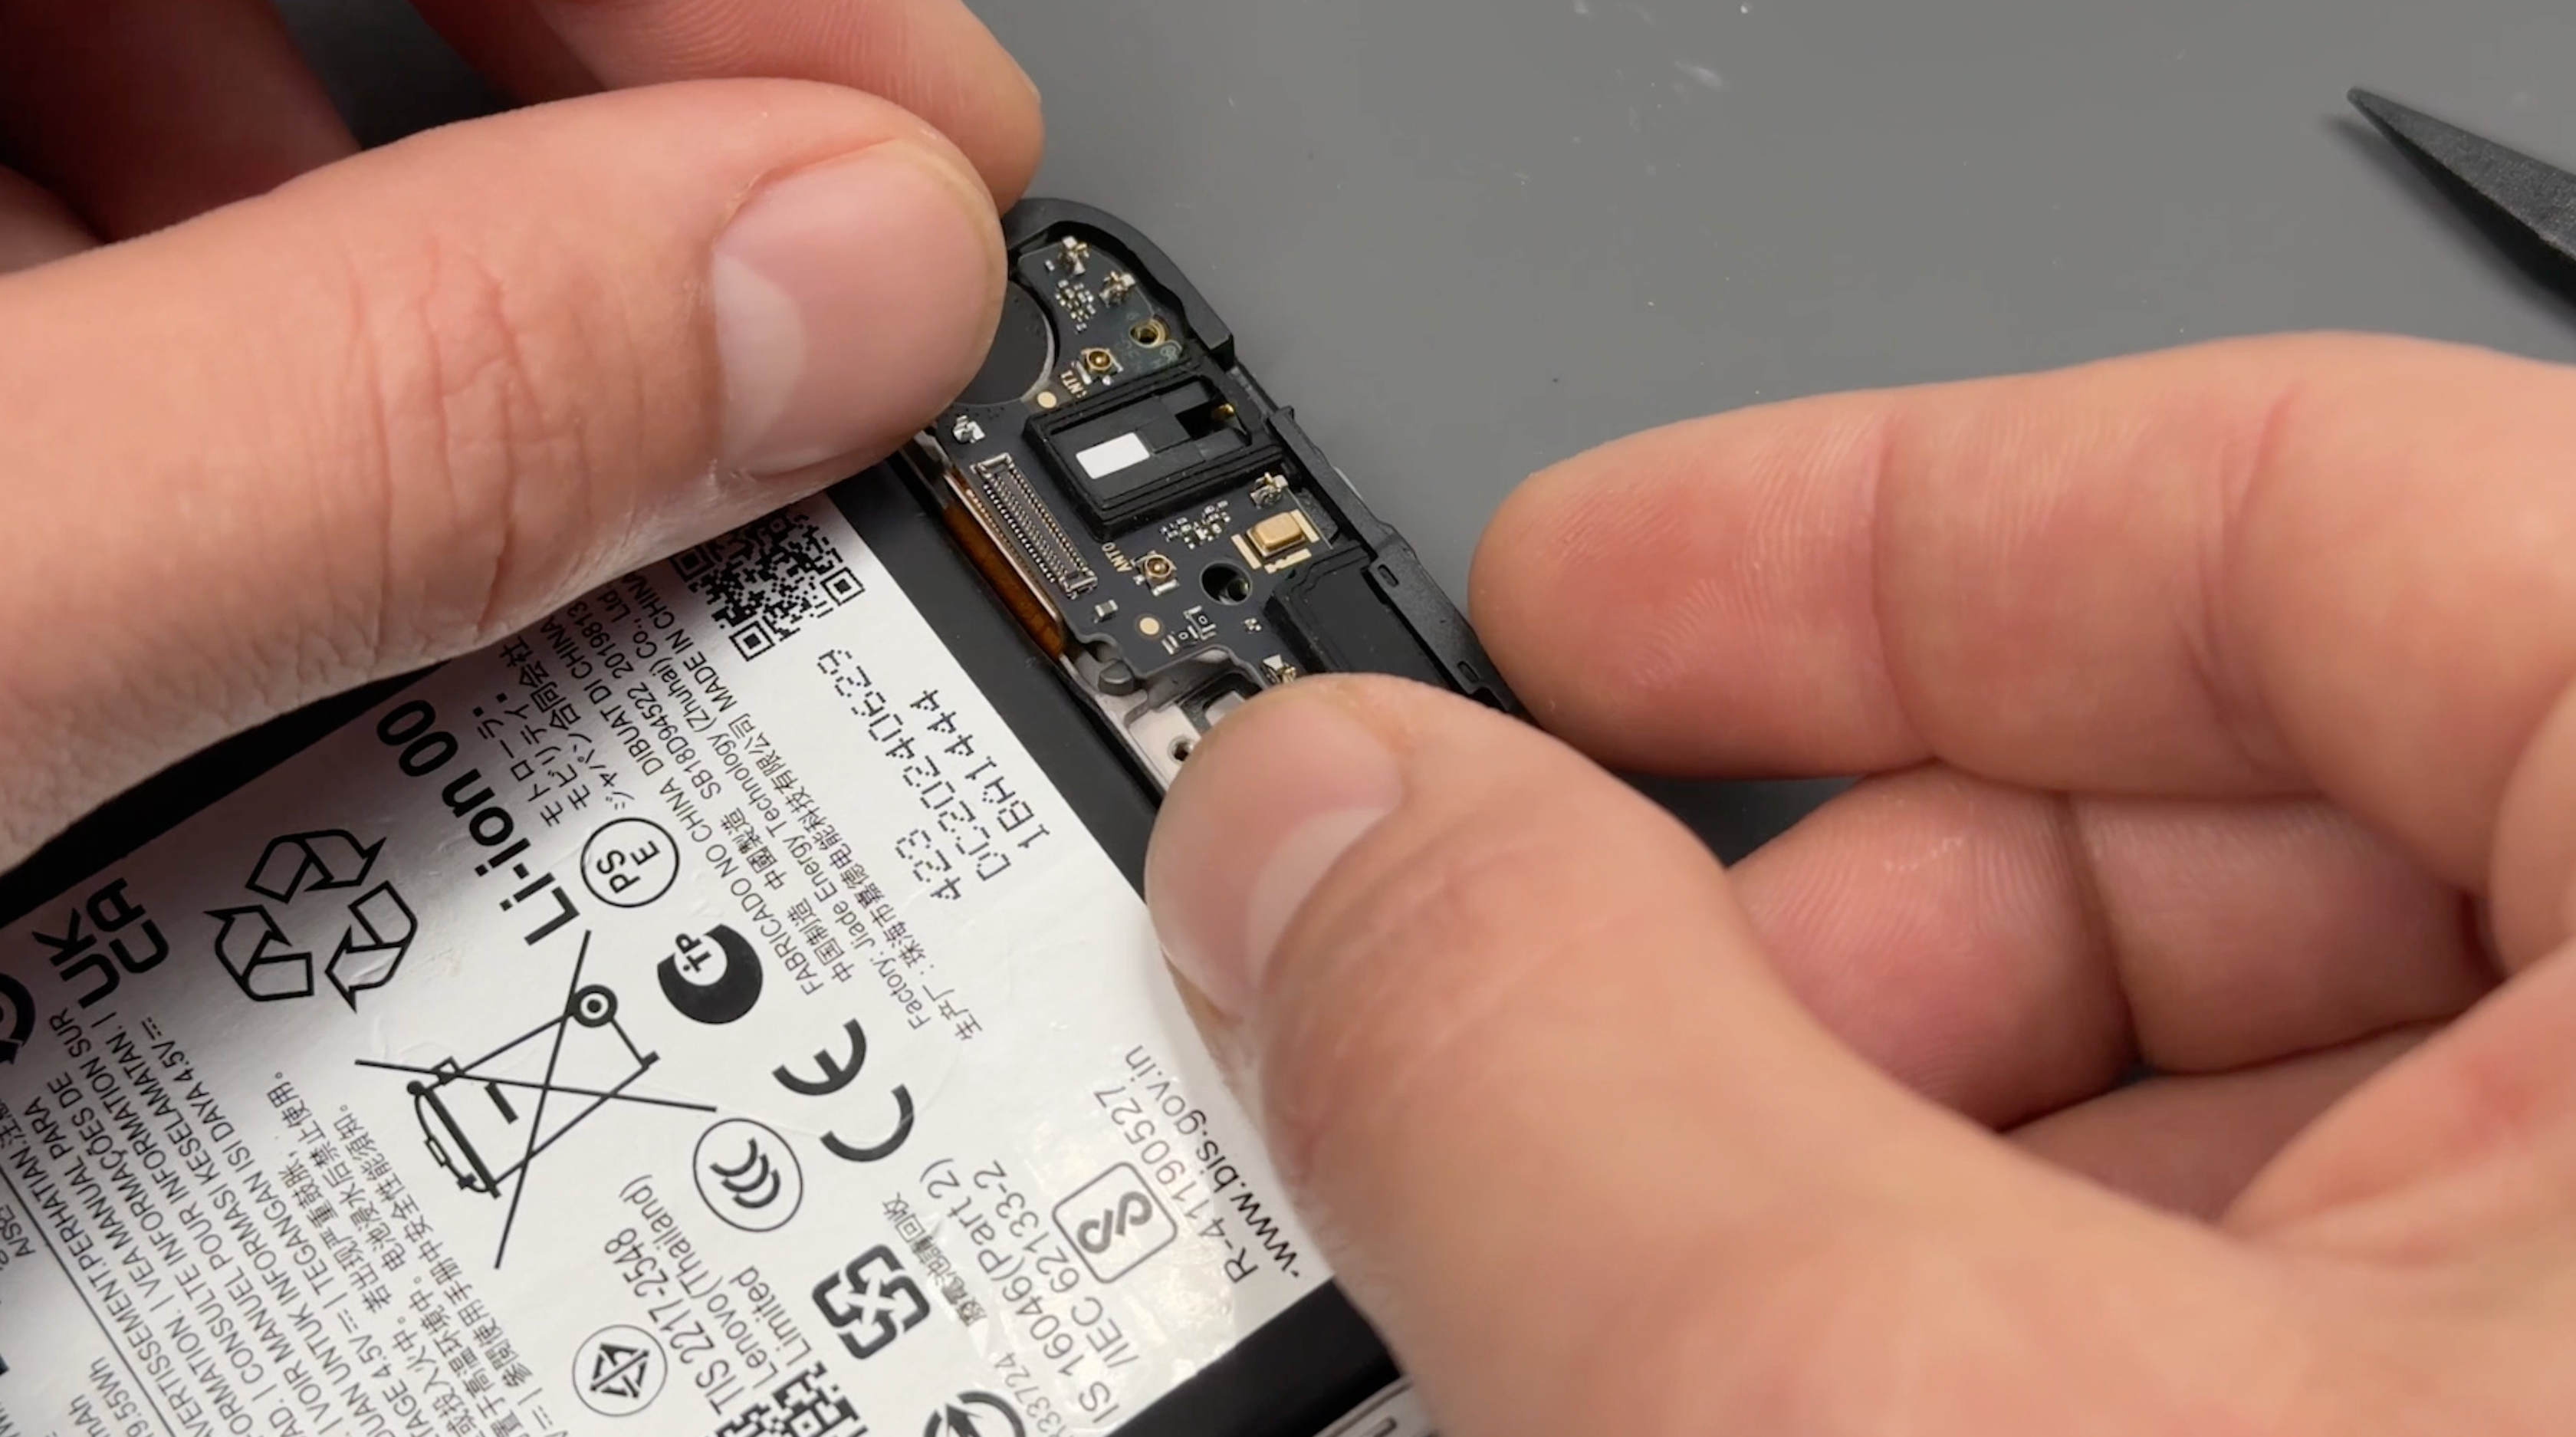
Carefully guide the black and white coaxial cables into their designated grooves in the phone’s frame. Once positioned, center the coaxial cables on the port and press gently until they click into place.
Reconnect the flex cable, re-fit the speaker and finally reconnect the battery connector.
CAUTION: Coaxial connectors are delicate and can be easily damaged, so handle them with care and avoid applying excessive force.
- Frame Reassembly
Align the fingerprint cable with its connector on the phone’s board and press firmly until you feel it click into place.
Apply even pressure around the frame to snap it back into place, ensuring it is fully secured as you work your way around the edges.
Reinsert the screws into the frame, turning them gently until they are secure. Avoid overtightening to prevent damage.
- Battery Cover Re-installation
CAUTION: Ensure the inside of the battery cover and the camera units on the phone are free from dust or fingerprints before proceeding.
Check that the battery cover is free of any old adhesive. If any remains, simply peel it off or rub it away with your finger.
Align the new adhesive with the battery cover, ensuring proper placement, and press firmly to allow the adhesive to bond securely to the cover.
Carefully remove the protective film from the adhesive, peeling slowly to prevent it from lifting.
Reattach the battery cover to the phone, aligning it properly, and apply firm pressure around the edges of the device to ensure a secure seal.
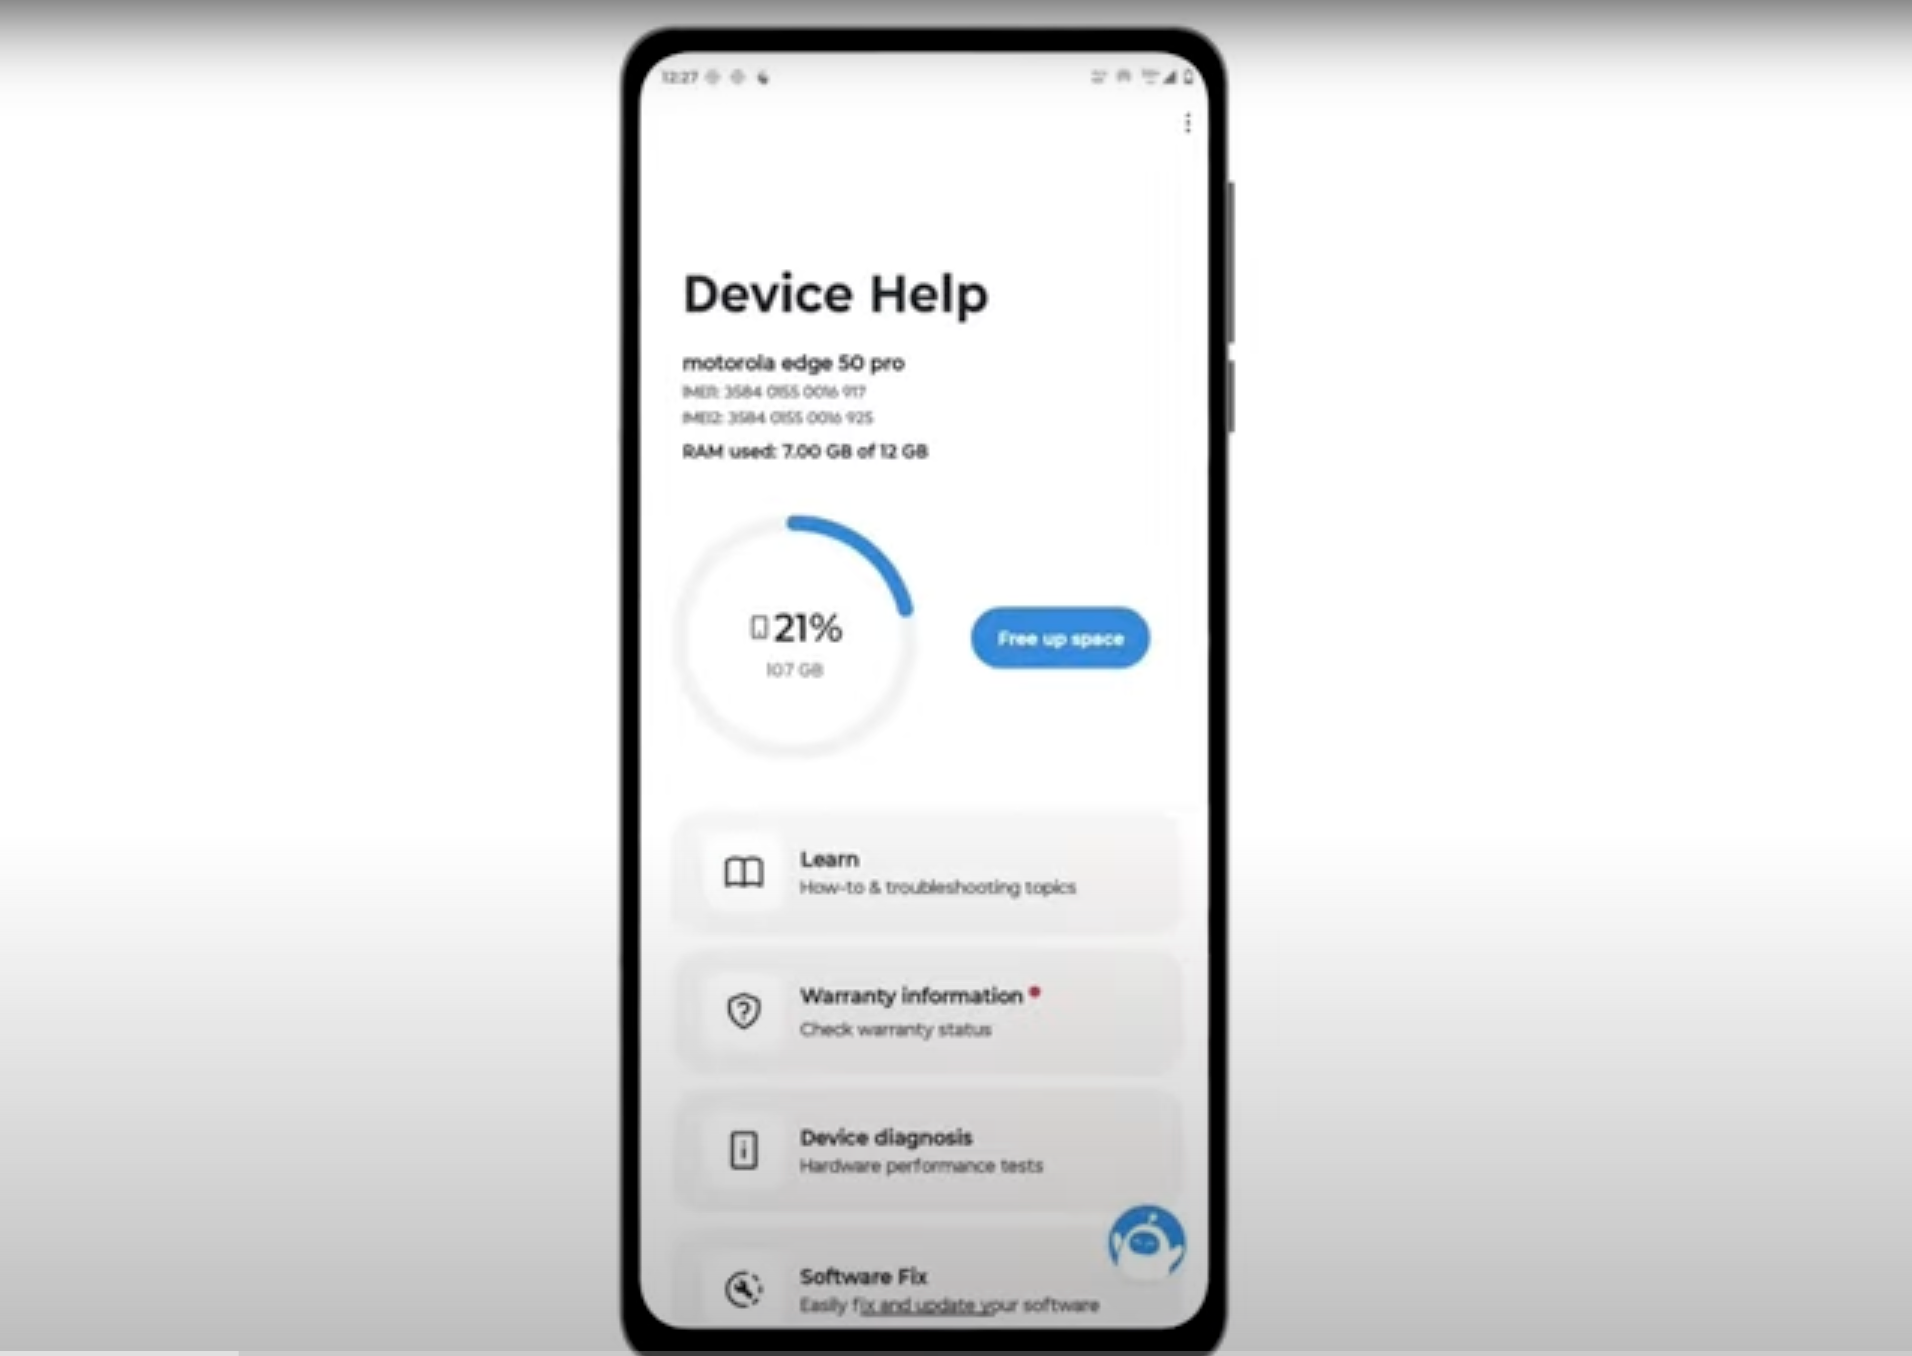
- Final Testing & Device Help App
Download and run Motorola Smart Assist to fully test your device and follow any required configuration.